How to Use an Offset Smoker Effectively – A Beginners Guide
The Basics for How to Use an Offset Smoker
I put this video together to go along with another one of my YouTube videos for cooking on an offset smoker. While my previous video went into much more detail, this one really is to cover the basics. Topics in this video include:
- Setting up your offset smoker (getting it level)
- Choosing your fuel type
- Selecting the smoking wood and which wood species not to burn
- Starting your fire and avoiding a major mistake a lot of newbies make.
- Review of the parts of an offset smoker
- How temperature is controlled on an offset smoker
- What is the best type of smoke during your cook and how to control it
- Tips for caring for your smoker after the cook
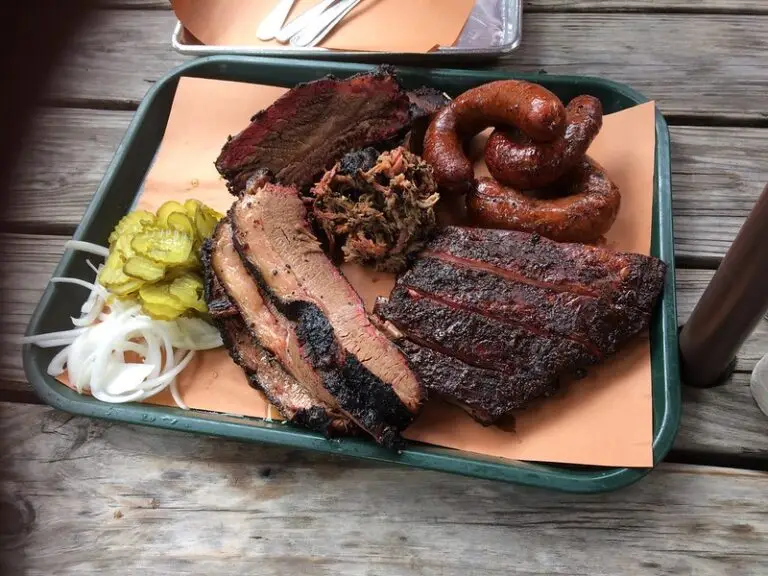
Cooking on an offset smoker is such a manly thing, because you are using a wood fire to cook your food. It takes a level of skill to operate this device and get it to produce awesome BBQ. Mastering these types of pits are what separates the Pitmasters from just an average Joe backyard BBQ’er.
I’ve found that people just starting out sometimes find it a little bit challenging, and there are usually lots of questions that people have. This video is to try and help answer most of those basic questions to get the new offset smoker owner up and cooking right away.
Setting up your offset smoker
Season your pit before your first cook
Seasoning your pit is one of the first things you will want to do before you start cooking. There are two reasons to do this. First, you want to get a fire going to burn or off-gas the paint that was used on your cooker before cooking on it. The second reason, is to build a protective layer on the surface to help prevent rust.
The seasoning process is pretty simple. Just take some vegetable oil and rub down the inside of the cooking chamber of your pit, making sure to get all exposed surfaces on the inside. Then you are going to build a fire and let that burn for an hour or two, trying to get the temp up to the 350 – 400°F range. This will do two things. First will cure that paint on your smoker and then create a protective barrier with the grease.
Smoker Modifications
If you just purchased a cheaper offset, now is the time to make important modifications to make it perform better. You will want to do this now while your are going through the assembly process to seal off gaps and add gaskets. The more air tight you make your pit, the better it will perform. If you want to learn more about offset smoker modifications, please check out this page on my site: 6 Easy Offset Smoker Modifications.
Level your smoker
If you don’t have a nice flat concrete patio or someplace level to place your smoker, then you will need to make sure it is level. You might think, why do you need it level, but it is important that any grease that drips off your meat will run down and collect in your drip cup. If you do get a build up of grease inside your pit, one day you will learn why you want it to drip out. Grease fires are not much fun, especially when you have a nice brisket going and you have to spring into firefighter mode to save it.
This doesn’t take much time and all you need is a cheap level and wooden shims or something to use as shim for the legs. I don’t get too carried away with this, but make sure that it is fairly close. Just make sure you are fairly level both right to left and front to back.
Choosing your fuel type (Charcoal)
Though offset smokers are made for burning full wood splits, I always use a base of charcoal to get my fire going to start off with. There are two main types of charcoal that are most popular, the briquette and lump.
Briquette Charcoal
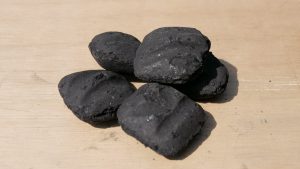
Briquette charcoal is the most common charcoal type. Made using charcoalified sawdust and binders, it is pressed together into uniformly shaped briquettes. It is a great fuel to start fires and is relatively inexpensive. It does burn a little cooler compared to lump charcoal and it will produce more ash. It does produce some smoke and smell as it first lights on fire, but is really just an annoyance. However it may tend to burn a little longer when compared to lump charcoal.
Lump Charcoal
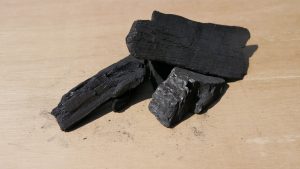
Lump charcoal is quickly becoming very popular in the BBQ and grilling worlds. Lump is made from charcoalified wood and broken up into pieces. Since it is a pure wood charcoal, it burns very hot and clean. There is much less ash left over when compared to briquette charcoal. However, all of these advantages come with a disadvantage, and that is that it doesn’t last quite as long as briquette. Lump can also be a little more expensive than briquette charcoal also. I find that it has its place for me. I use it when I’m trying to get a higher temperature for my cook. I will also use it when needing to add some charcoal to my fire to extend a cook since it is pure charcoal, it won’t give off any smells or off-putting flavors.
Selecting Your Smoking Wood & Which Types of Wood NOT to Burn!
Not all wood is created equal when it comes to wood for your smoker. The wood you cook your food with can help create unique flavor profiles that are pleasant to the palette, but there are pitfalls to be aware of. I’ll list cooking wood into two categories, wood that is good for your smoker, and wood that you absolutely do not want to cook with.
Good Smoking Wood
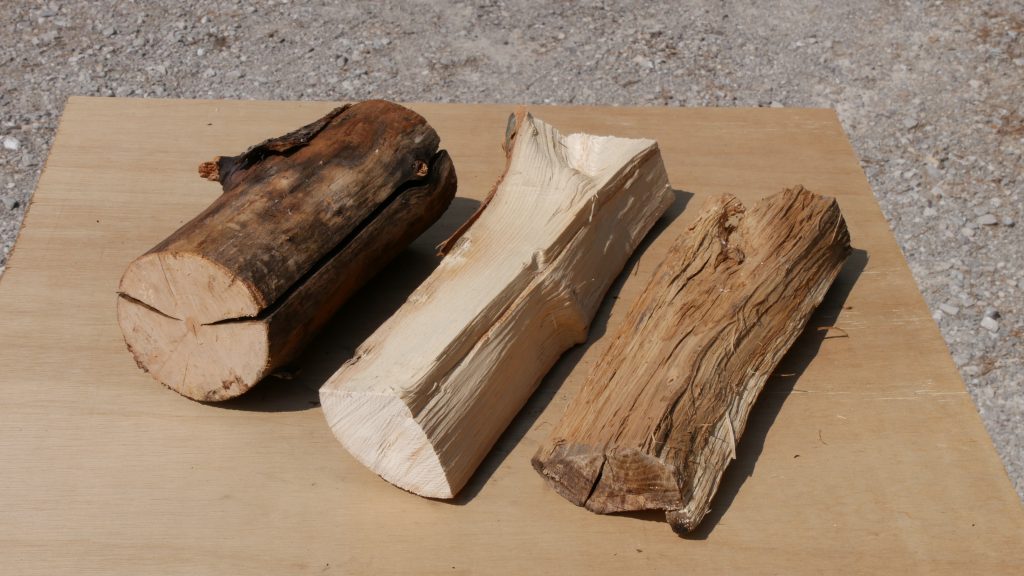
Wood that is good for burning in your smoker and will create a complementing flavor to your food will fall into two categories. First, are the hardwoods. Hardwoods would be wood such as oak, hickory, mesquite, walnut, pecan, cherry, and maple for example. The second category would be fruit woods such as apple, pear, peach, and grapevine.
Hardwoods are great because they typically burn hot and will last for a while. The flavors from hardwoods offer quite a spectrum of flavors, from a really strong flavor in mesquite to a more mild flavor from maple. Ideally you would want to find these wood types as split firewood for your smoker as you burn wood as fuel, you can save on the charcoal and give your food that more authentic BBQ flavor that the offset smoker is known for.
Fruit woods are also perfect for burning in your offset smoker. Fruit woods typically don’t burn as long as the hardwoods, and the flavor profile is typically more on the sweet and mild side. Fruit woods are perfect for cooking milder flavored meats, such as chicken, fish, and pork. Again, if you can find fruit woods in larger sized splits, it is perfect because you can burn the full splits of wood and get that offset smoker flavor to your food.
You are looking for wood to be firewood quality when burning it in your offset. That means that you want the wood to be seasoned and fairly dry before burning it for your cooking wood. If you try burning a green wood, not only will you have a hard time keeping your fire going, but you will also have problems with an overly smoked taste to your food. Seasoned firewood burns best, and that will give you the perfect fire to cook on.
The best thing about BBQ is you can experiment with different woods along with different meats to get unique flavors. There are traditional wood and meat combinations you can go with. For example, oak and beef or apple and pork are two typical combinations. I think the best wood to BBQ with is the wood that you can readily get as firewood. That means wood local to your area is the best wood to be cooking on.
DO NOT BURN THESE WOOD TYPES!
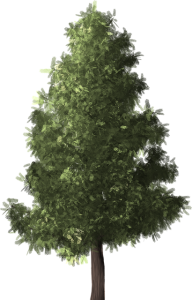
There is one category of wood you do not want to burn in your offset smoker. Do not burn any kind of evergreen wood. That means you do not want to burn pine, cedar, hemlock, or spruce in your cooker. These woods will have a heavy dose of sap in them, that once burned will produce an extremely off flavor that will get on your meat. The worst thing is to spend hours cooking a piece of meat and then find out when you go to eat it that it doesn’t taste good because you used the wrong wood when smoking it.
Lastly, do not burn building materials either. This probably seems like common sense, but I think I needed to just mention it. Obviously, many building materials have several thing going on that you would not want to be burning it for cooking your food. Besides that fact that many of the lumber typically comes from evergreen woods, other materials have had added preservatives or coatings that you don’t want burning for your food.
Bottom line here, stick to the hardwoods and fruit woods for your smoker.
Fire Starting Tips
- Use charcoal for this. Either briquettes or lump. It is easier to get a good lasting fire going with charcoal than trying to use kindling.
- Start the charcoal using a chimney starter. I find a full chimney of coals works best.

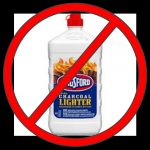
- Do not use lighter fluid on your charcoal, or use a lighter fluid soaked charcoal. Use a wax or other natural fire starter with your chimney starter.
- Don’t dump your charcoal into your smoker until the top pieces start to ash over in your chimney starter. Usually takes about 15 minutes or so.
- Place a base of unlit coals on one side of your firebox. I usually put about a chimney full of unlit coals on one side and when I add my lit charcoal, I add that to the opposite side. That way the fire will eventually burn over to the unlit coals and help your coals last longer.
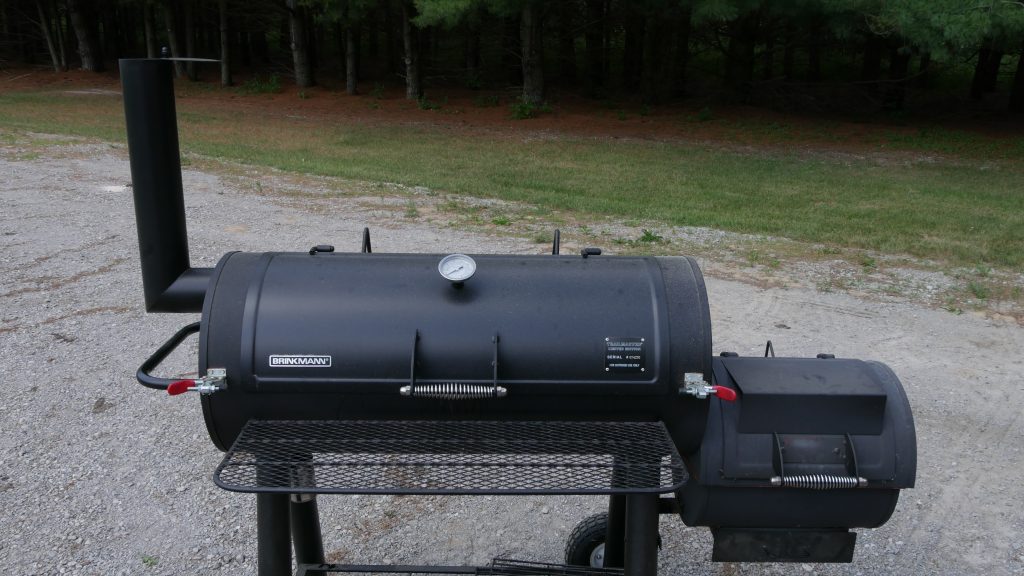
The Parts of an Offset Smoker
The Firebox
The firebox is the place on your smoker where you build your fire. All offsets will have the firebox either to the right or left of the cooking chamber, and slightly lower than the cooking chamber. This is so as the fire burns, the smoke and heat will flow up and through the cooking chamber and out the chimney.
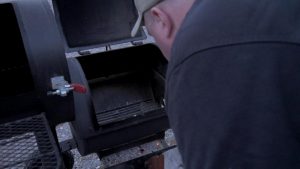
The Cooking Chamber
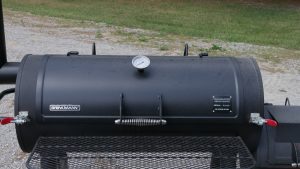
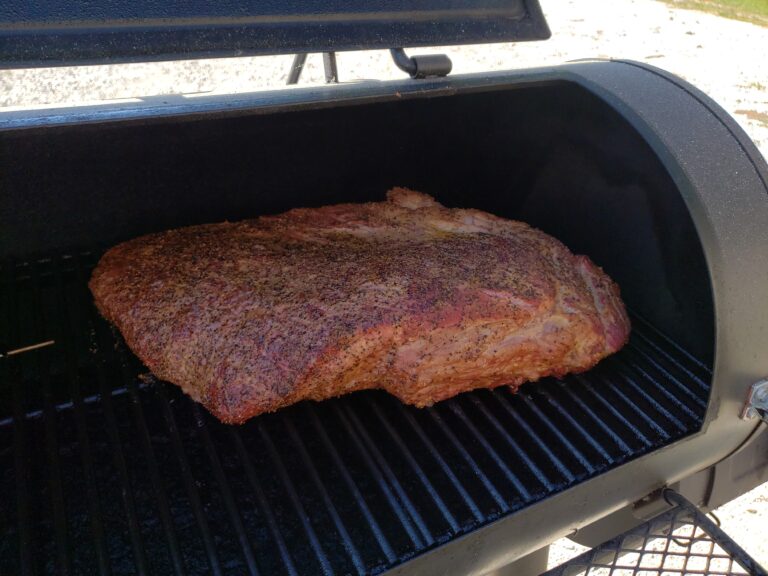
The largest piece of your offset smoker is the cooking chamber. You are not going to build a fire in your cooking chamber, but this is where you will place your food to cook. Your offset smoker cooks the food through indirect heat. That means the heat and smoke from your fire in the firebox travel through the cooking chamber and cook the food.
Some people ask if they can use their cooking chamber as a grill. I usually tell them that yes you could, but I wouldn’t recommend it. Your offset is made for smoking and bbq, not for grilling. I think if you want to grill, get a grill. By using your offset cooking chamber as a grill, you are going to create a mess with ash and drippings that will have to be cleaned out prior to using it as a smoker again.
Since the cooking chamber is open to the fire box on the one end, you will find that temperatures inside the cooking chamber will vary from the firebox side to the chimney side. Obviously it will be hotter towards the firebox, and cooler towards the chimney. This is one thing you will want to understand and learn about your cooker. That way you will know that you need to rotate your food throughout the cooking chamber during the cook to try and keep the food cooking evenly. If you would like a more consistent temperature across the cooking chamber, you can make a modification by adding deflector plates that will force the heat and smoke to slowly roll up inside the chamber. This can get your temperatures from one end to another to be within 5°F at the cooking grate.
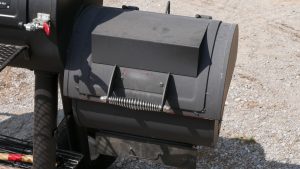
The Chimney
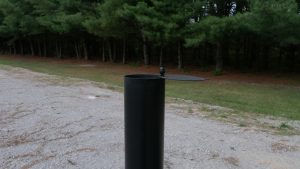
Obviously the main function of the chimney is to vent the combustion gasses and smoke from your fire to the outside of the smoker. However, it can have an impact on your cooking depending either on it’s location based on your smoker’s design, or how much air flow it gets.
You will find depending on the type of smoker you have the chimney may be placed in a couple different locations. The first of these would be the standard or traditional location opposite of the firebox. In this location, the heat and smoke travel across the cooking chamber from the fire to the chimney and out of the smoker. This type of smoker typically will have a temperature variation from one end to there other, with the firebox side the hottest. The second location you could find your chimney would be on the firebox side of the cooking chamber. This type is called a reverse flow offset smoker. There is a little more to this type of smoker, as it forces the heat and smoke all the way to the far end of the cooking chamber and then back across the cooking grates to the chimney. In order to do this, there is a baffle in the bottom of the cooking chamber that forces the heat and smoke to the other end. The advantage to this is even heating across the cooking chamber and a more even smoke across your food.
Finally, the chimney also can control air flow by adjusting either a damper or a flapper cover within it. This is one of the controls you have for controlling your smoke and temperature. For me, I always recommend keeping it wide open to start with. Then depending on how your particular cooker performs, you may be able to close it off slightly to improve your cooking temperatures. Closing it off will lower your temperatures and could create more smoke from your fire, so keep that in mind. When I’m cooking on my offset, I have mine wide open because my pit needs that air flow, and because I don’t prefer a very strong smoke flavor on my food.
Inlet Vent
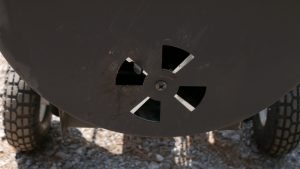
The inlet vent is the most important control device you have on your smoker. It is located either on the end or the sides of your firebox. It will be either a butterfly style or a slider type that allows you to give more or less air to your fire. Learning how to adjust this and when to adjust it is one of the keys to mastering your bbq pit. The next section we are going to talk about how to use this for controlling your smoker’s temperature and the smoke from your fire.
Controlling the Temperature
One of the most important topics and one of the topics that get the most questions is regarding temperature control on an offset smoker. Roasting meats using indirect heat is quite a bit different than direct heat grilling, where you don’t need to be as precise with the temperatures. When grilling you either adjust your burners on a gas grill or move your food around the grate to control temperature. This is completely different, and because we are cooking with wood, there is just a sense that there is much less control. While you won’t have the control of temperature that you would have in your kitchen oven, with these tips you can get it close and produce excellent wood smoked BBQ meats!
First thing you need to do is get your pit in order. Without some control over air gaps and leaks in your pit, it will be difficult to control the temperature. Take the time to seal up leaks in your pit and make sure your cooking chamber door seals completely. Otherwise it will have an effect on your cooking temperatures. For example, I can get as much as 25 degrees lower temperature if I don’t have my cooking chamber door latched. That little bit of imperfection of the fit of the door to the cooker can make that much of a difference!
The next thing I recommend is to get a digital BBQ thermometer. You may be thinking: Why do I need that, my pit has a thermometer on it already? Well, that thermometer probably has two issues. One, it may not be very accurate. Two, it is measuring the temperature higher in your cooking chamber. Both of these issues can cause the temperature reading from the mounted thermometer to be as much as 25 degrees different from what is happening at the cooking grate level (i.e where your food is). With a digital BBQ thermometer you can place the probe right at the grate level, most come with alarm for temperature and multiple probes so you can place one in the meat.
Finally, now that you have your gear in order, lets get to understanding how to control the cooker. Here is an easy way to think about this:
- Increase temperature requires – More air to fire (open inlet vents) and/or more fuel (add more wood)
- Decrease temperature requires – Less air to fire (close inlet vents) and/or less fuel (use less wood/charcoal)
Now you can also use your chimney damper to help control temperature, but I recommend not doing this at first. This can cause other issues with smoke and the quality of your fire that will not be good for your food. So stick with adjusting the inlet vents for now.
What is Thin Blue Smoke? How do You Get It?
Example of “Thin Blue Smoke”:
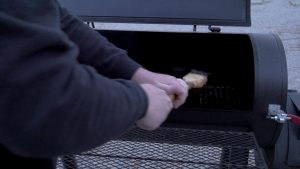
See why its called thin blue smoke? If you noticed in the video, the smoke disappeared against the blue sky. Now that we have an example of “thin blue smoke” the question is how do I get that all the time? Before I answer that question, let me first set some expectations here. There may be times when you have more of a white puffy smoke for a short period of time, like say a couple of minutes. This will happen when you first add a piece of wood to the fire. If the wood doesn’t completely catch fire, you will get some white smoke until it does. In this case it is OK to have that little bit of white smoke. You want to minimize this as much as possible. It can be minimized by pre-heating your wood over your firebox before adding it to the fire. This will help the wood catch fire faster and have less white smoke.
Now, back to the question, how to keep the thin blue smoke? The key here is to keep a clean burning fire. What does that mean? It is a fire that has the right air to fuel combination. That means we want to make sure you have enough air to the fire. A lack of oxygen to the fire will make it smolder and produce the white puffy smoke.
- If you get white puffy smoke ⇒ open up the inlet vent and/or the chimney damper if you adjusted that.
- If you are still getting white puff smoke ⇒ open your firebox and adjust the wood until your fire burns with a steady flame.
If you really get the right mix of air to fuel, it is possible to have no visible smoke coming out of your chimney. Don’t worry, you are still getting the flavor to your meat if you are burning wood. If you use only charcoal, you will also notice this more often with little to no smoke coming from the chimney.
Remember loads of white smoke billowing from your pit may look cool, but it is not what you want for cooking your food. This will result in an over-smoked flavor to your food which some people may not like. So maintain your fire to get the best tasting BBQ you can get.
Caring for Your Smoker
Finally, the last thing you need to do every time you finish cooking is to take care of your pit. Here are a few tips to do each time you cook to make sure your pit will last a long time:
- Open the firebox and the cooking chamber. This will let any trapped moisture dry out before closing it up and letting it cool down.
- Scrape all the food residue off of cooking grates.
- Remove all the ash and remaining coals from the firebox. Make sure there is no longer any hot, burning material inside the firebox. Please be careful as everything will be hot. Get some gloves with excellent insulation for this job. If you get yourself a galvanized metal pail or old coal bucket will work great for this.
- After the pit has cooled down, either store your pit indoors (garage or shed) or get a cover for it if storing outdoors
Periodically you will need to empty the grease cup from your smoker. Especially if you are cooking a lot of fatty meats, it will fill pretty quickly. Make sure you stay on top of this, otherwise you will get a greasy mess that you will want to avoid.
Now Get Out And Start Cooking
This guide should give you the basics to start cooking with an offset smoker. At this point, you need to get out and start cooking. There are things you will need to learn about your individual pit, such as how much fuel you need to maintain different temperatures and where the hot spots may be in your cooking chamber. When you are ready for a little more detail watch this video:
How to Use Offset Smoker Tips & Tricks
If this has been helpful, please leave me some comments below on how this helped. If you have other questions, either leave a comment here or on the comments of my YouTube video and I’ll be sure to answer them.
Good luck, and go out and create some GREAT BBQ today!